
Why your PDF is big, and which lever actually shrinks it
· 10 min read
A text PDF and a scanned PDF are the same complaint with opposite fixes. Here is how to tell which one you have, and which lever actually shrinks it.
Most guides to this subject hand you a slider and work backwards from it. That order is backwards, and it explains why so many people compress a file twice, get a modest saving, and conclude the document is already as small as it gets.
PDFs get their weight from a short list of places, and those places need opposite fixes. A document that is heavy because of structure (duplicated object definitions, an uncompressed cross-reference layout, dead resources) can be repacked for free and losslessly. A document that is heavy because of pixels will not move by one kilobyte unless you throw pixels away. "Compress it" collapses those into one instruction. They are different operations, and the gap between them is worth an order of magnitude.
Key Takeaways
- A text PDF and a scanned PDF are the same complaint with opposite fixes. Diagnose first, then act.
- Pixel count scales with resolution squared. 300 → 150 DPI is four times fewer pixels, not two.
- Re-saving one 5-page file took it from 424.22 KB to 324.41 KB, a 23.5% cut, without altering a single pixel.
- The compressor on this site carries a quality slider that changes nothing. Positions 10, 70 and 100 return identical bytes.
Two copies of the same document, four megabytes apart
You have opened the same report twice. One copy arrived at 4.1 MB, the other at 380 KB. Same pages, same words, pictures at what looks like the same sharpness. If PDF size were a property of the content, those two files would match. They do not, and that gap is the entire subject of this article.
None of this is a rare request. A Google keyword export for compress pdf free, pulled on 8 October 2026 for US/en, records the seed term compress pdf free at 9,900 searches a month and the well-formed compress pdf for free at 14,800, so the malformed phrasing was the more searched of the two. The file behind those counts is all_categories-compress_pdf_free-en-us-08-10-2026.csv, 750 rows across five platforms. That seed carries no reduce variant at all, which is worth stating rather than glossing over.
Weight lands in a PDF in a handful of places, ranked by how many bytes each tends to own:
| Source of weight | Typical share of a large file | Shrinkable without quality loss? |
|---|---|---|
| Raster images embedded in pages | Often 80–95% of a scan, 10–40% of a designed document | No. Bytes track pixels. |
| Embedded fonts | Large in logo-heavy decks, modest elsewhere | Partly, since subsetting removes unused glyphs |
| Document structure: object definitions, cross-references, duplicated resources | Frequently 10–30% of a text-heavy file | Yes, entirely |
| Metadata, embedded files, thumbnails, orphaned objects | Usually a few percent | Yes, entirely |
The third row is the one that matters. Structural weight is pure overhead, the cost of the format's own bookkeeping, removable without touching a rendered mark. Image weight is not overhead. It is the picture.
Which makes "my PDF is too big" not a diagnosis. It is three problems wearing one coat, and only one is fixed by the button most guides point you at.
Step 1: Find out which problem you have
Two checks, both free, both under a minute.
First, drag across a line of body text. Open the file, click at the start of a sentence, drag to its end. If the text highlights and the cursor becomes an arrow, you have a digital PDF, whose characters are real objects with a font attached. If the drag paints a flat grey rectangle and nothing is selectable, every page is a scan, one big image per page with no text layer.
That single gesture splits the whole subject in two.
Second, divide the file size by the page count. A digitally produced page tends to land in the tens of kilobytes. A full-page colour scan at 300 DPI tends to land near a megabyte. Divide and compare against a document of the same kind. Exact ranges swing too much by producer to be worth quoting, but the ratio is the signal. Same file, same pages, an order of magnitude apart means raster weight.
For the precise version, pdfimages -list from Poppler prints every image object with width, height, colour space and encoding, with the effective resolution stated outright.
Step 2: The levers, ranked by what they actually save
This is the table most guides leave out, because filling it forces them to admit which tips do nothing.
| Lever | What it changes | Reduces bytes? | Typical payoff | Quality cost |
|---|---|---|---|---|
| Downsample the raster | Replaces each page image with a lower-resolution one | Yes, by far the most | Pixel count scales with resolution squared, so 300 → 150 DPI is about 4× fewer pixels | Visible when zoomed or printed; invisible on screen at 100% |
| Convert to monochrome | 1-bit bilevel in place of 8-bit greyscale or colour | Yes | Often the single biggest win on black-and-white scans | Loses colour, stamps and red pen |
| Lower JPEG quality | Fewer bits per pixel on an already-photographic image | Yes | Modest, and wildly content-dependent | Artefacts at aggressive settings |
| Re-serialise the structure | Rewrites the object graph and packs it into object streams | Yes | Roughly 10–30% on typical text PDFs | None, since no pixel is read or written |
| Subset fonts | Keeps only the glyphs actually used | Yes | Real on font-heavy files | Can break rare glyphs if done badly |
| Strip metadata and orphans | Removes properties, thumbnails, unreachable objects | Yes | Usually low single-digit percent | None |
| Linearise ("fast web view") | Moves the cross-reference table to the front | No | Zero bytes | None |
Three rows touch image bytes: downsample, monochrome, JPEG quality. Three more are structural. The fourth costs nothing and almost nobody performs it, which is why a file with no oversized images can still lose a fifth of its weight.
The resolution question, answered with arithmetic
This is the most useful quantitative fact in the subject, and it is arithmetic rather than folklore.
Pixels = inches × resolution. That relationship holds per axis, so total pixel count scales with the square of resolution. Drop from 300 DPI to 150 DPI and each axis halves: ½ × ½ = ¼. You keep one quarter of the pixels, and roughly one quarter of the raster payload at unchanged encoder quality.
It is not a factor of two. Anyone who tells you 300 → 150 halves the file has done half the multiplication.
Run it against A4 at 8.27 × 11.69 inches: 300 DPI gives 2480 × 3508, about 8.7 megapixels per page. 150 DPI gives 1240 × 1754, about 2.2 megapixels. Same page, same sheet of paper, one quarter of the data.
Those conventions deserve to be called conventions. 300 DPI is the usual setting for anything headed for print, and it is not arbitrary: inkjet printers sit in a 300–720 DPI class, per Wikipedia's overview of dots per inch, so 300 lands inside a real printer's working range. 150 DPI is the usual setting for material read on screen, and it comfortably exceeds a typical monitor's pixel density. Treat both as what people do, not as a standard's ruling. The arithmetic is the part you can rely on.
What the browser compressor actually does
This is where most tutorials stop and this one starts, because the honest answer beats the standard advice.
The free PDF compressor on this site runs entirely in your browser. The PDF engine loads into the page itself; there is no upload, no account and no network request carrying your document anywhere. Dropping a file in only queues it. Nothing happens until you press Run Optimization. Uploading is not compressing.
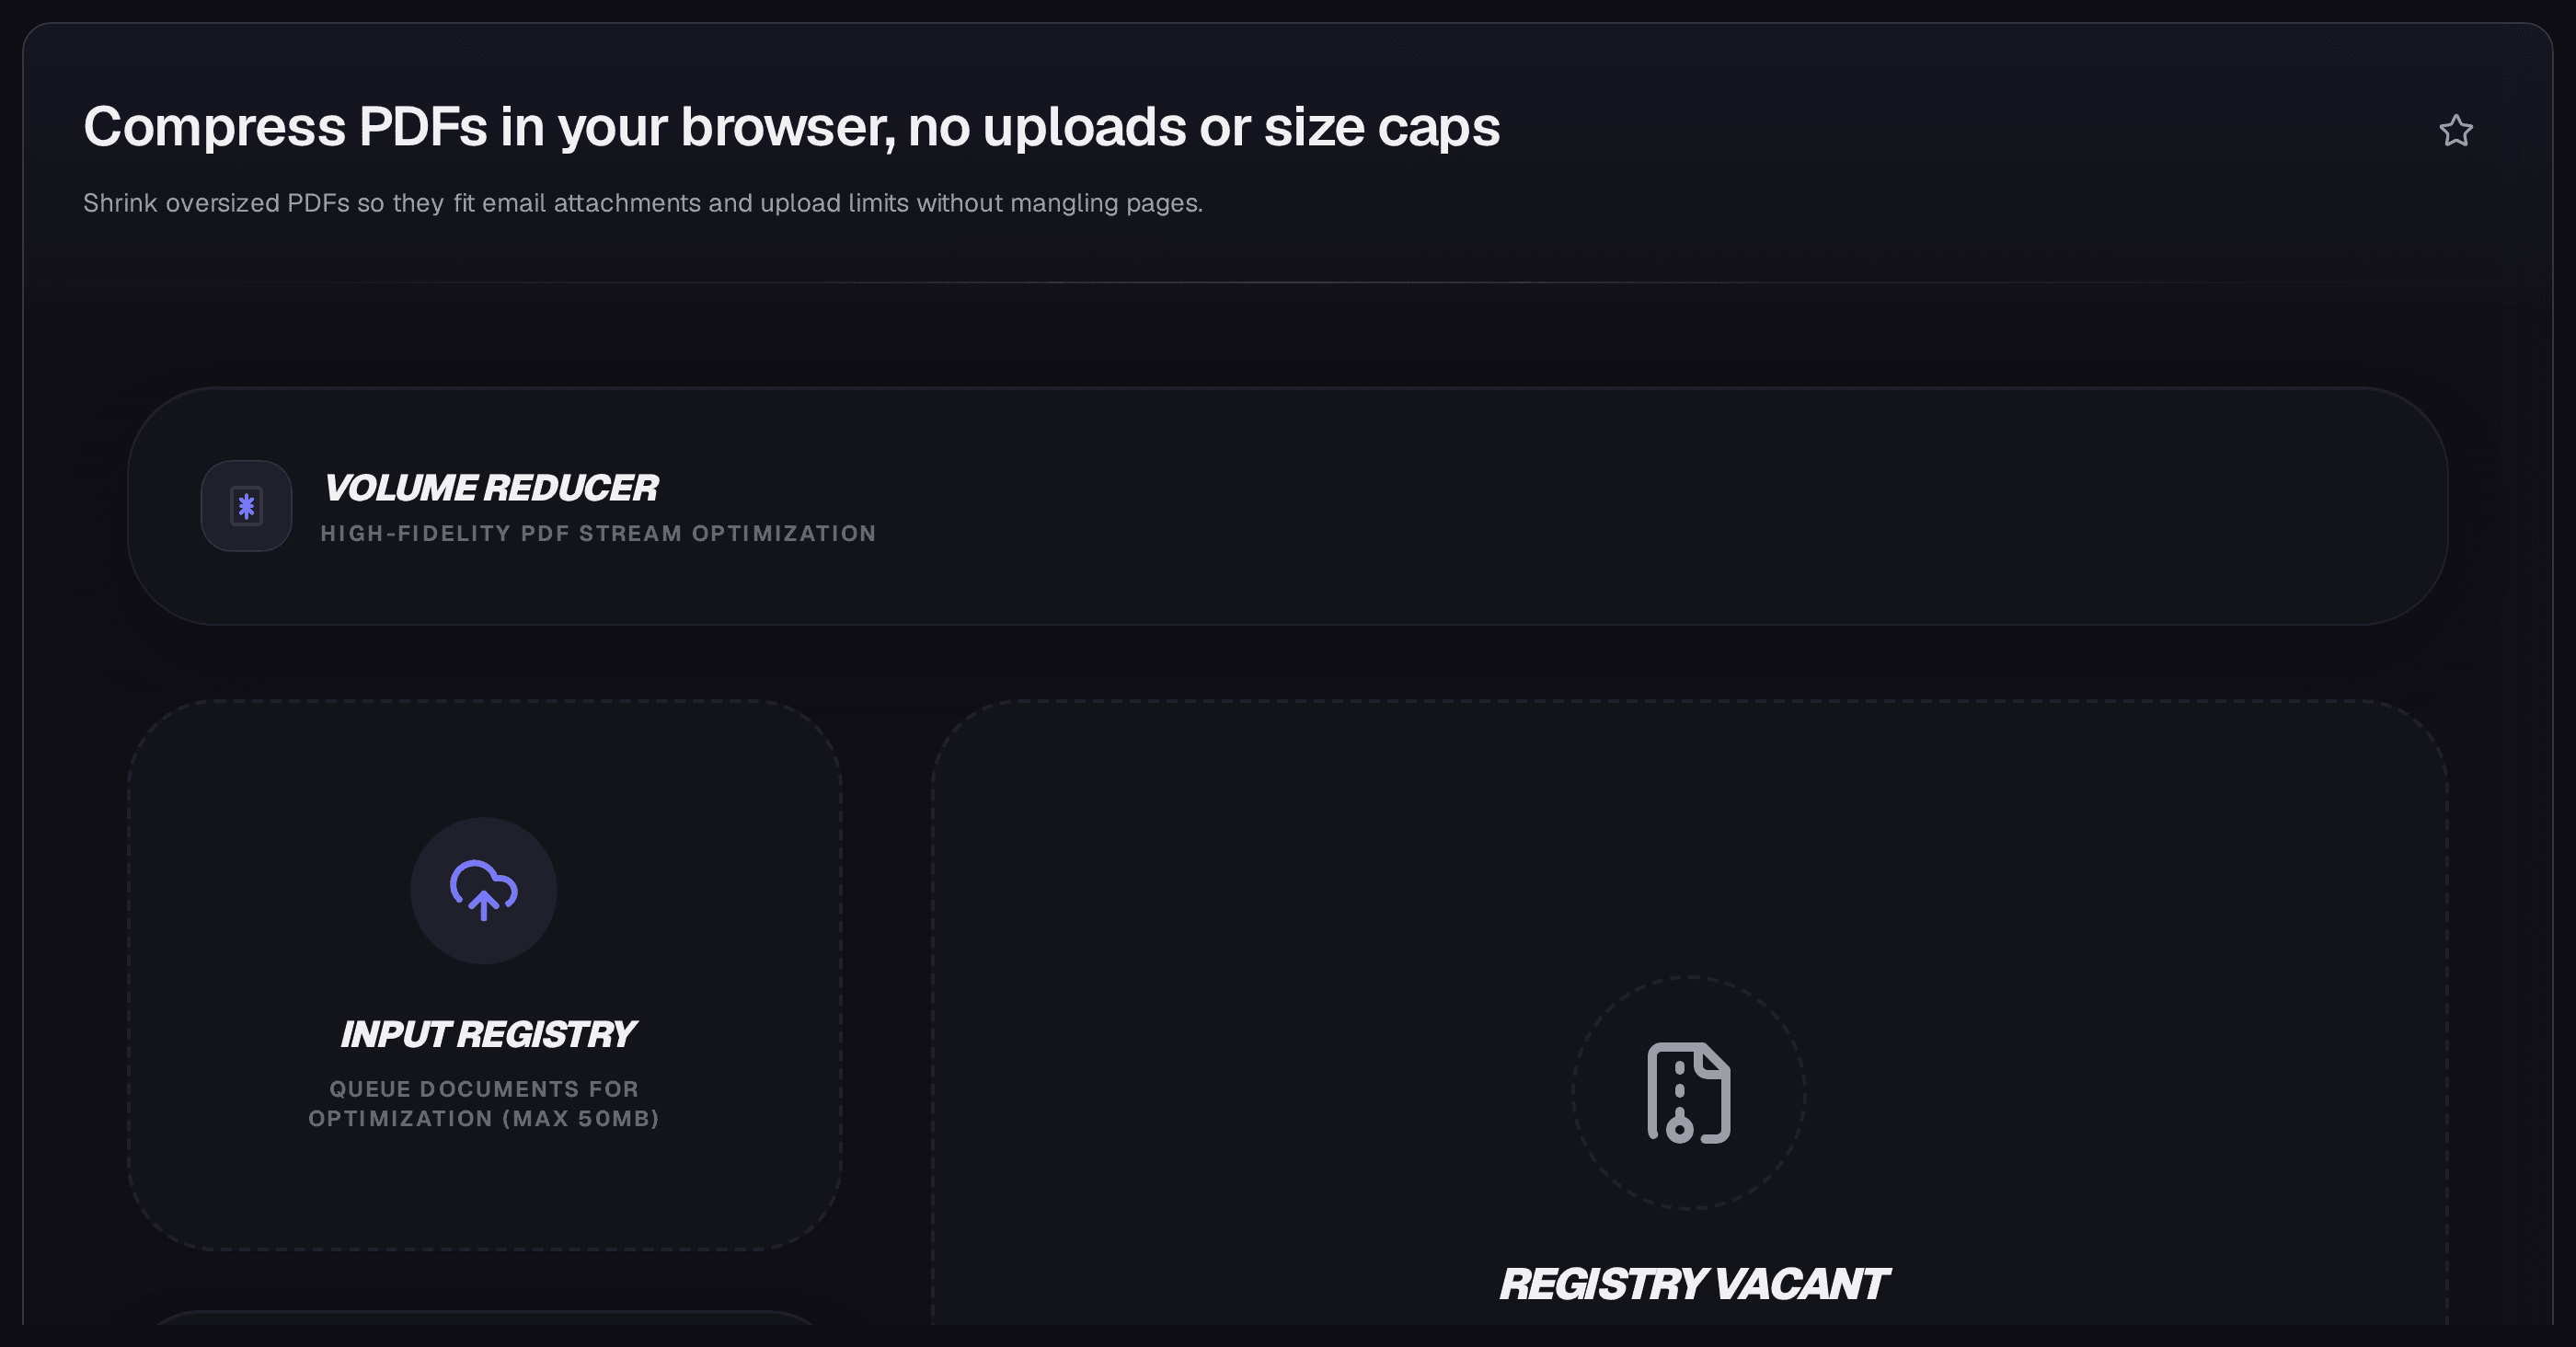
Nothing has run yet. The file is queued locally; the button is what starts work.
The quality dial runs 10 to 100, and a band label above it changes as you move: Aggressive below 40, Standard below 75, Lossless above that.
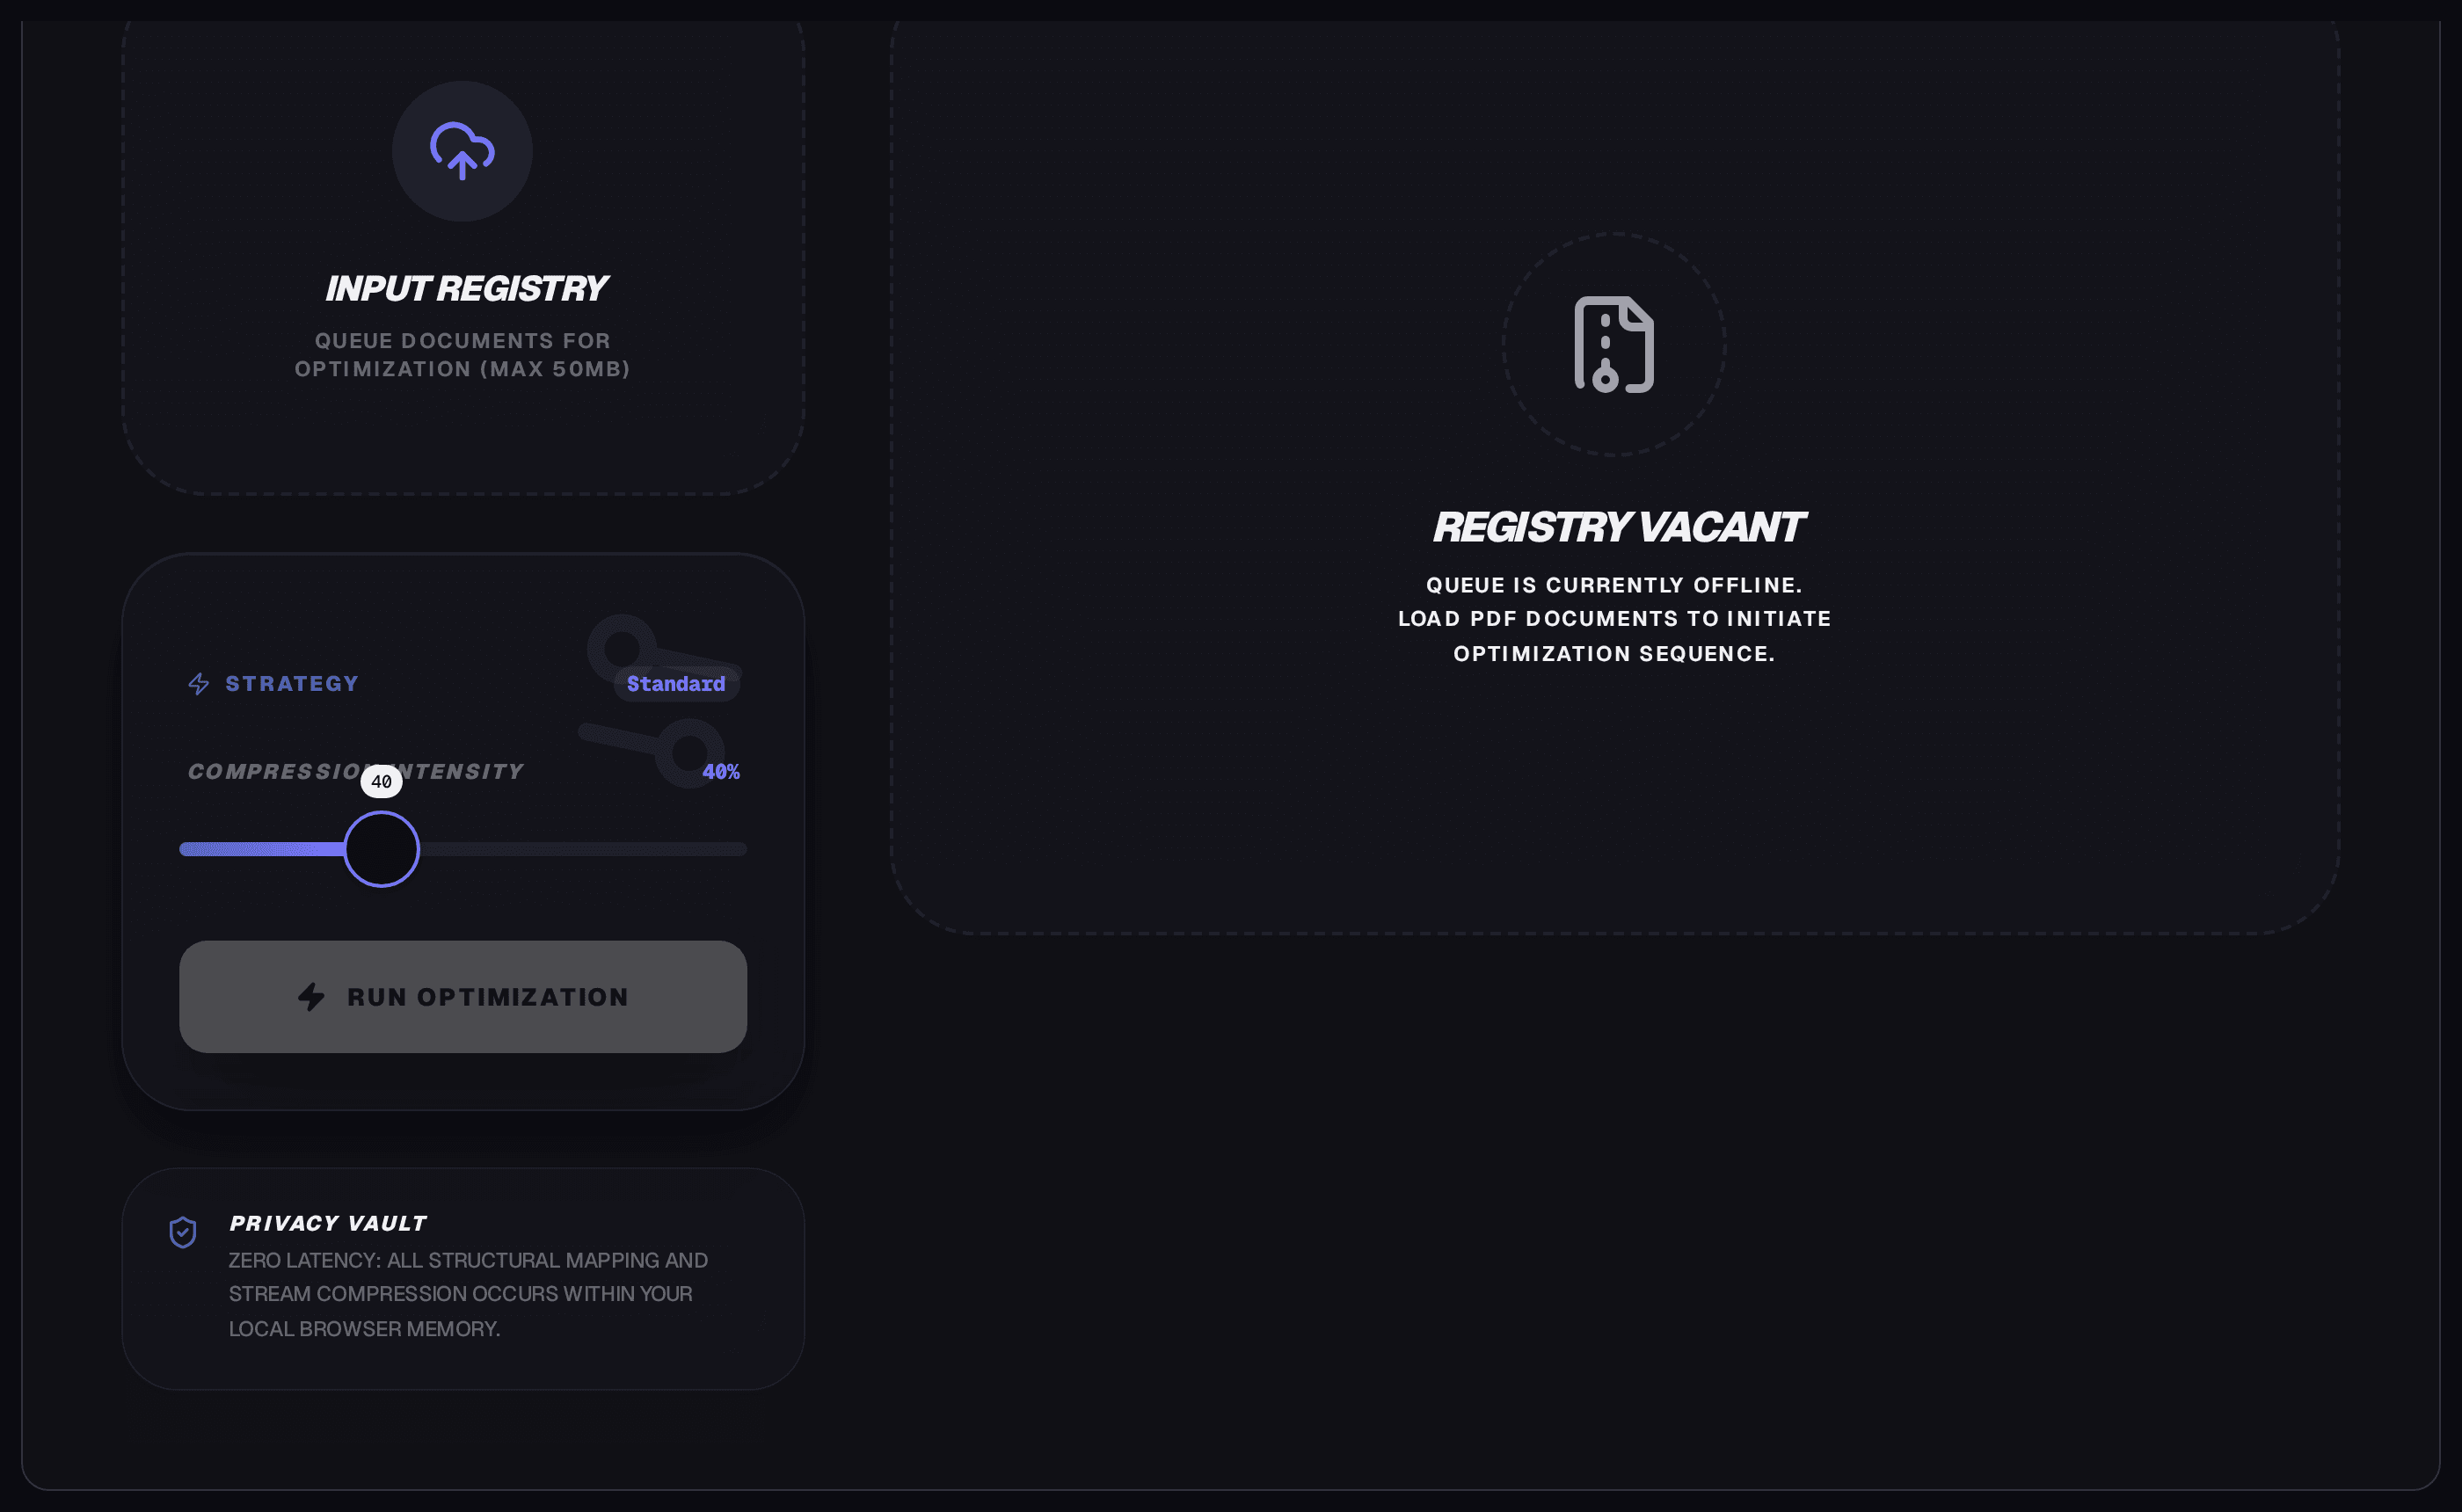
Aggressive. The label describes where the dial sits, not what will happen to your file.
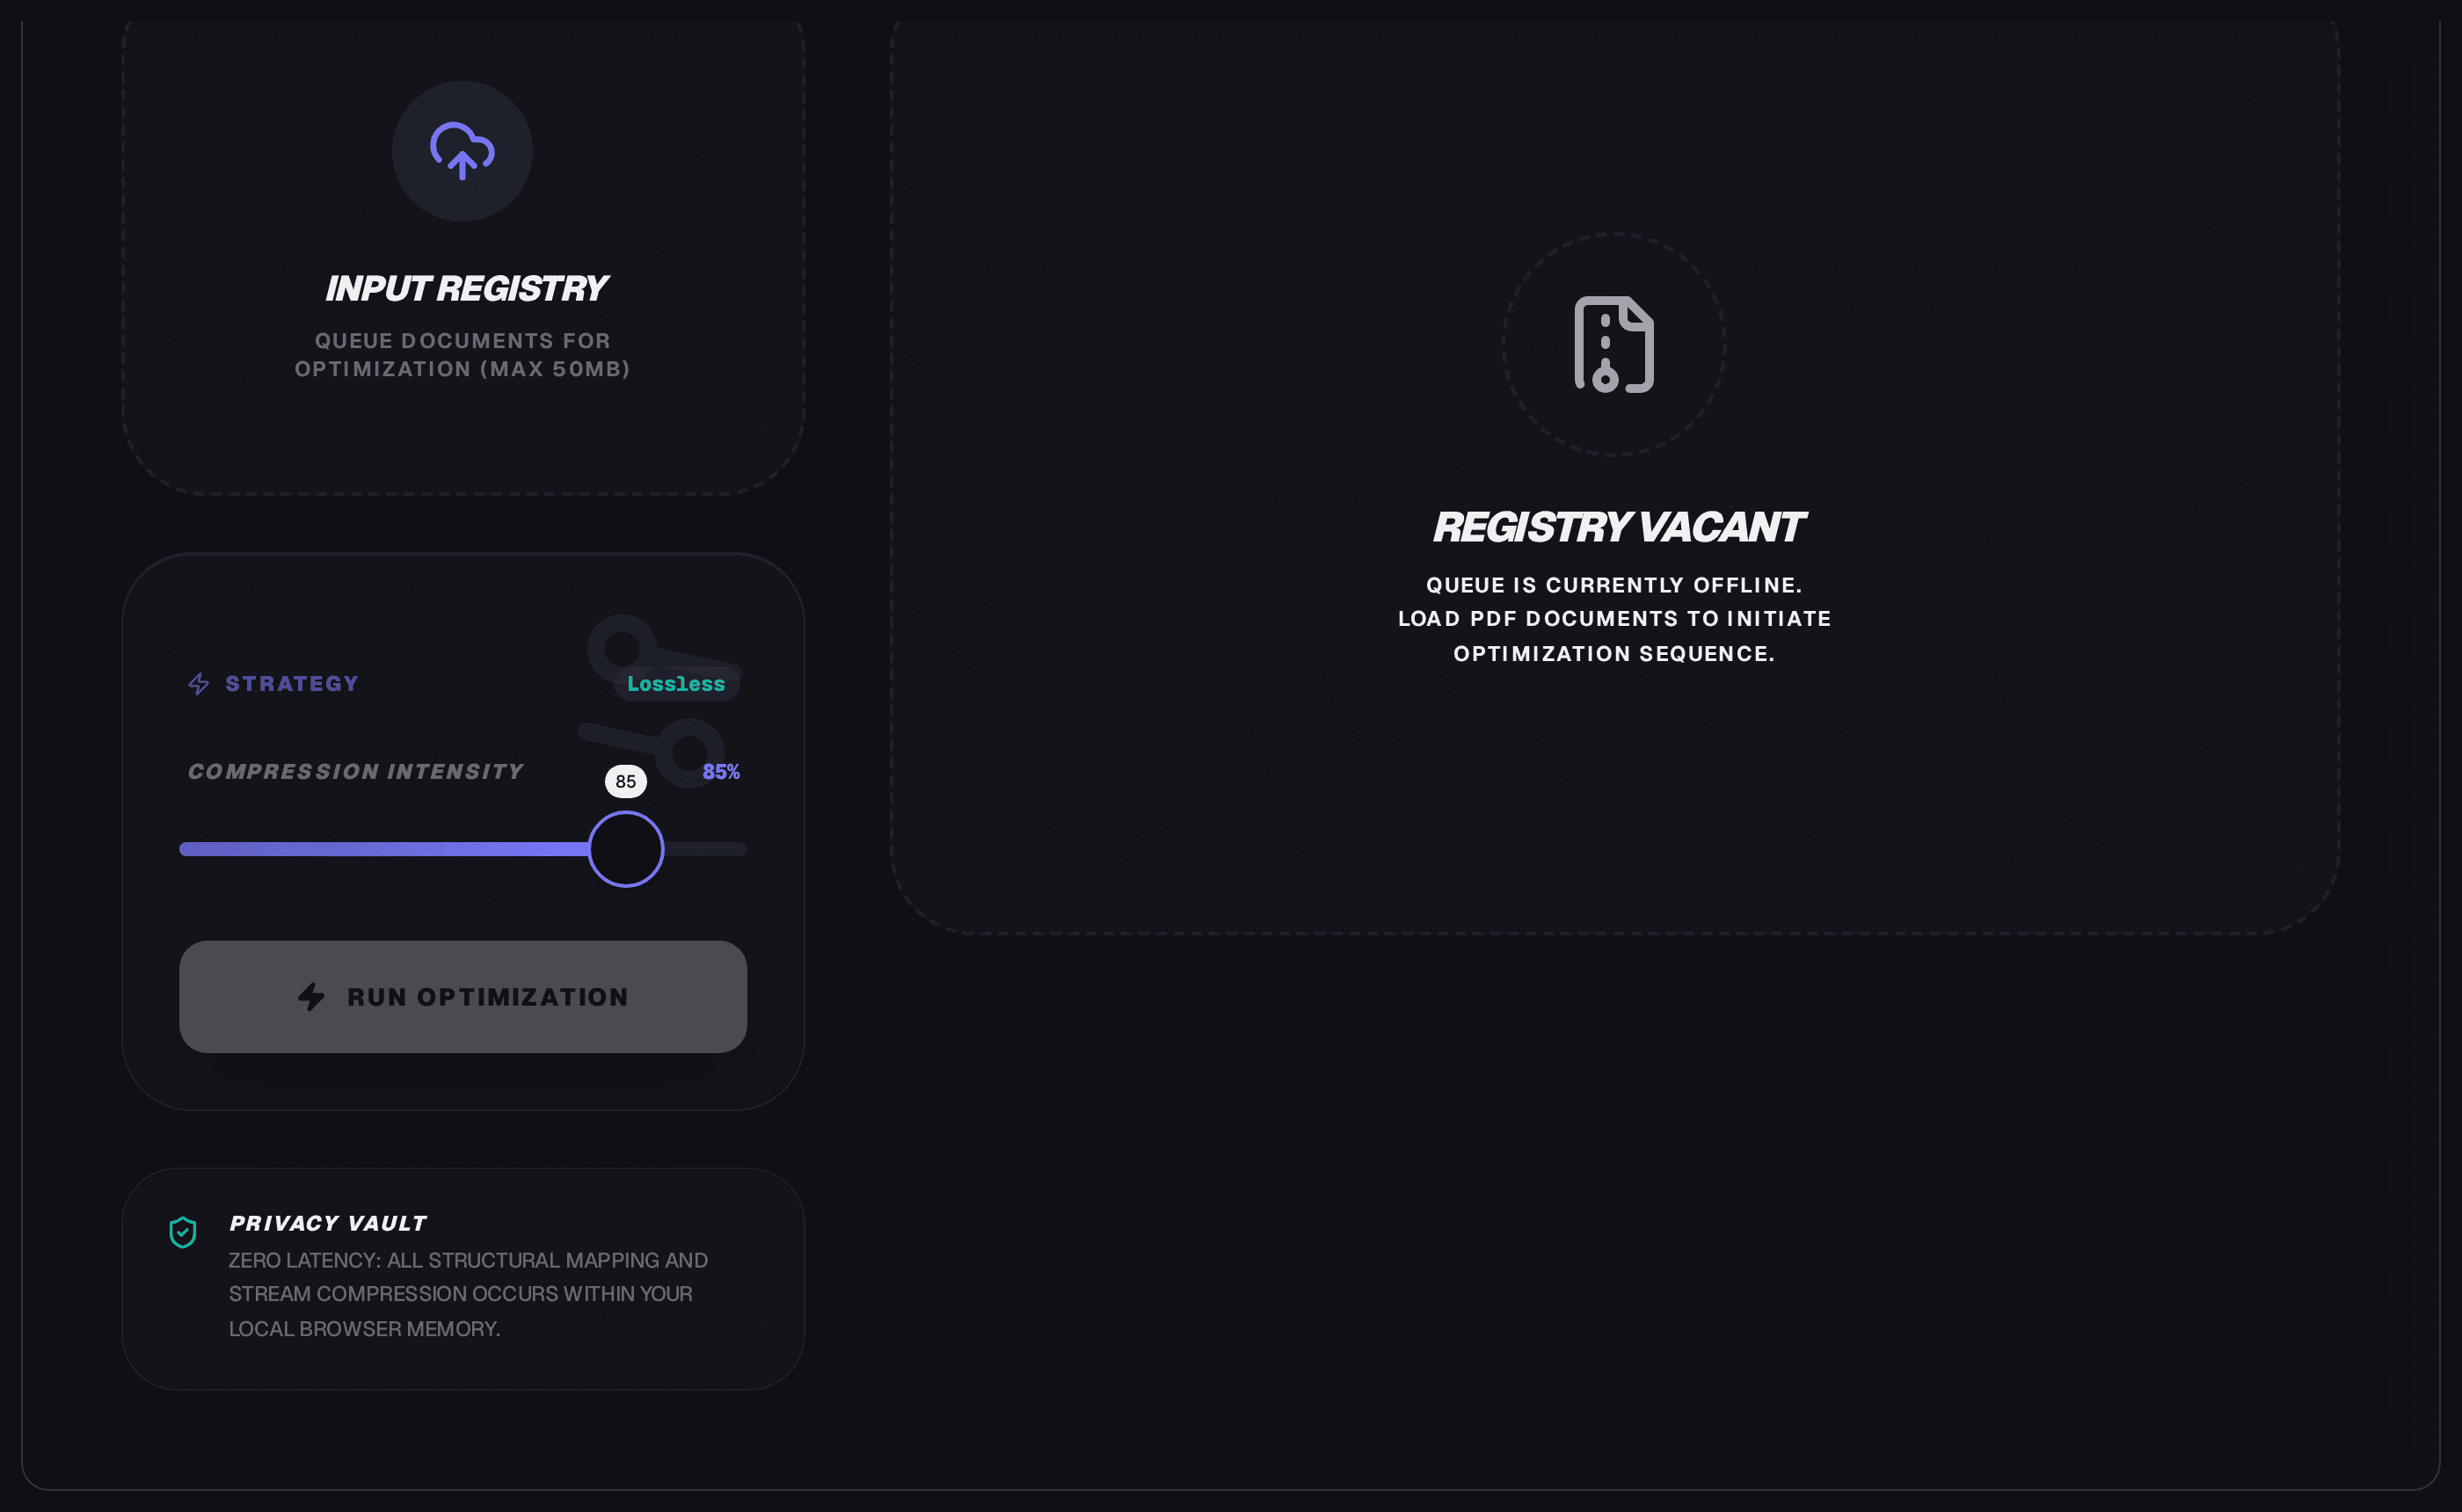
Lossless. Same dial, opposite end of the range, same output.
That dial is not connected to anything. The quality setting appears six times in the compressor's source, five of them interface: the swatch colour, the band name, the numeric readout, the slider value, and its accessibility label. The sixth is where the number is stored. The compression routine reads none of them. It loads the PDF, creates an empty document, copies every page across, and saves the result with object streams switched on. There is no resampling step, no downscaling and no JPEG re-encode anywhere in the file.
So what does running it achieve? Take a 5-page A4 file. It arrives at 424.22 KB and downloads at 324.41 KB, 23.5% smaller.
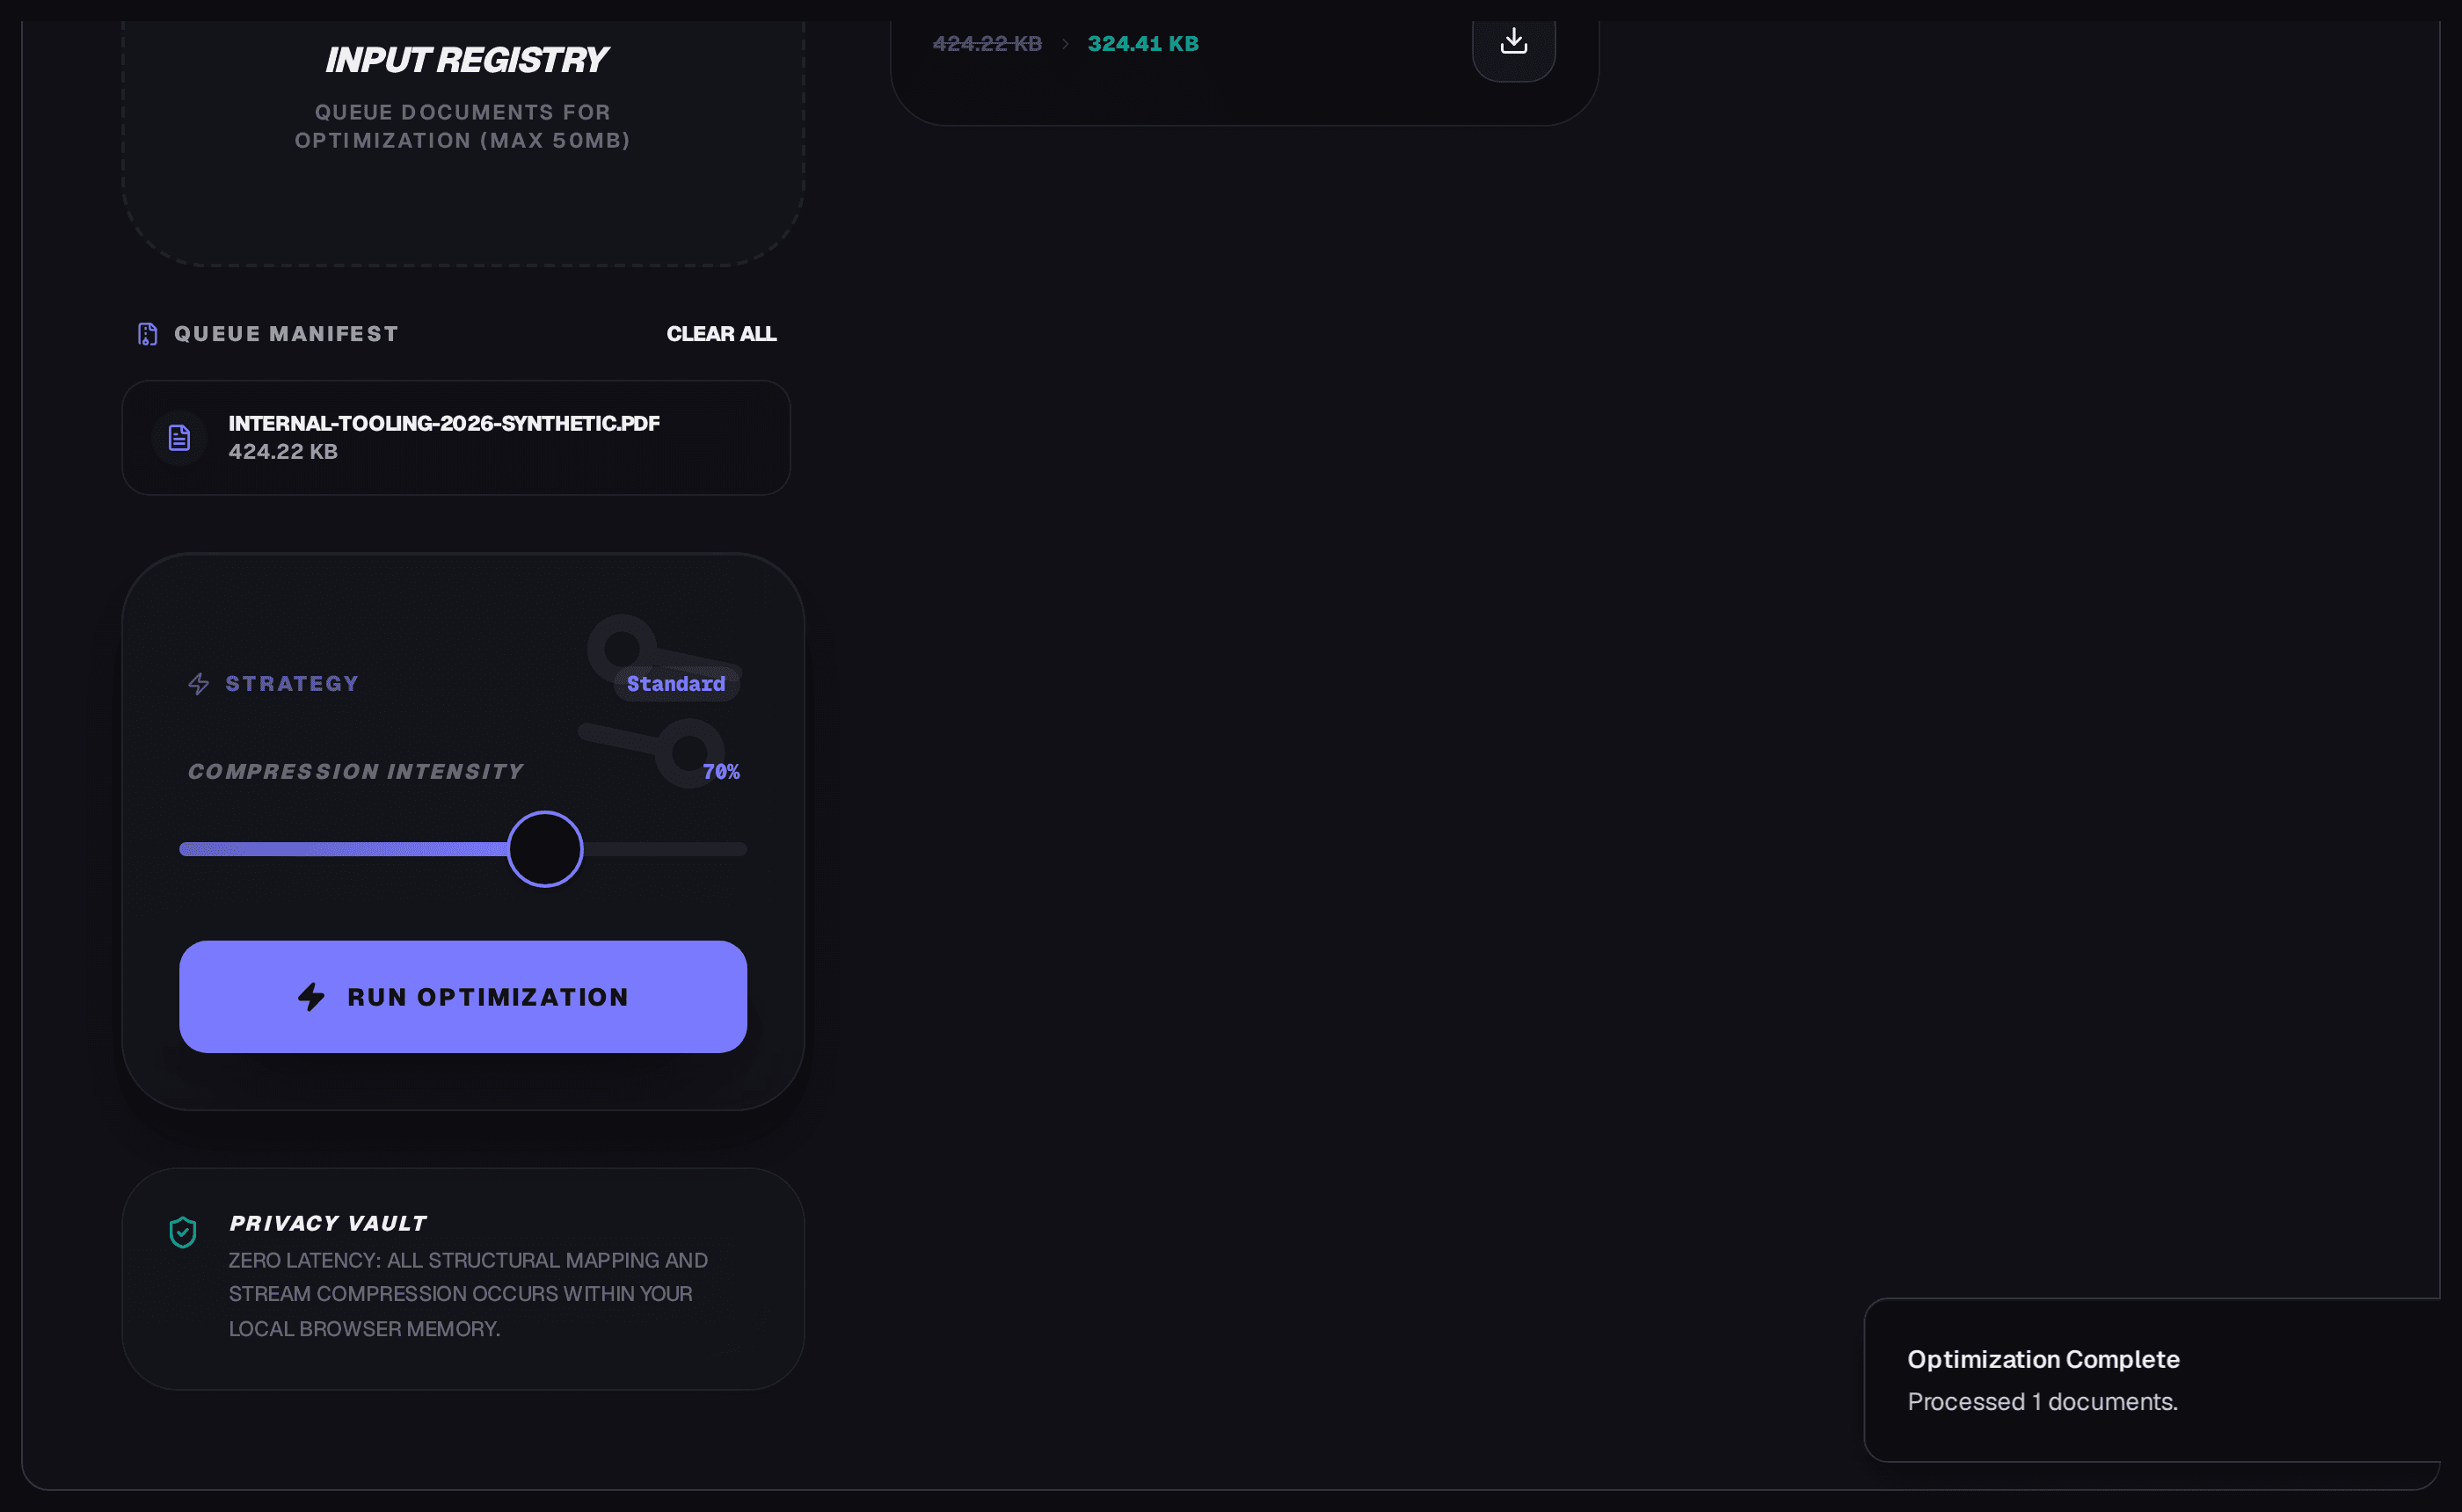
424.22 KB to 324.41 KB. No visible quality change, and the dial was sitting at its 70% default.
That 23.5% has nothing to do with the setting. I ran the same file at 10, at 70 and at 100. The output came back byte-identical every time, 324.41 KB on all three runs.
What the 23.5% actually is, you can check without running anything. Open the source file in a text editor and search for ObjStm: it is not there. That document stores its several hundred objects as a plain cross-reference table at the end, one definition at a time, exactly as it was written. Saving it back out with object streams enabled packs those same definitions into compressed containers instead. Nothing disappears from the page. The bookkeeping simply gets cheaper.
Two caveats. This is the only page-touching operation in the code, so it is almost certainly the whole cause, but I did not instrument it object by object: call the attribution well-supported rather than proven. And it is one measurement of one file. A document produced by a real optimiser has already had this slack removed and returns single-digit percent at best.
What cannot be fixed
Some files will not move, and it is cheaper to know that in advance.
| Situation | Can it be shrunk? | Why |
|---|---|---|
| Already-optimised PDF | Barely | The structural slack is gone; expect single-digit percent |
| High-resolution scan, 300 DPI and up | Only by downsampling | Needs a raster decode-and-re-encode pipeline, which is not what this tool has |
| Heavy vector art, CAD drawings, maps | Very little | Vector content is already compact; the image levers do nothing to it |
| Password- or permissions-protected | No | The file opens, but its streams stay encrypted, and this tool will not break DRM. Remove the password first, then reduce it |
| Signed or flattened forms | No | Re-serialising invalidates the signature or the saved field values |
| A colour annotation on a black-and-white scan | Trade-off | Monochrome is the biggest available win and also the change most likely to destroy what you need |
The blunt version: a tool that only re-serialises structure will never produce the 80–95% reductions scan-heavy files are advertised as getting. If a page promises that, in your browser, with no quality loss and a slider, it is describing a pipeline it does not have.
When the ceiling is the real problem
Sometimes the file is fine and the limit is not. Mail providers cap attachment size, and the cap is not the same number for every provider, every account or every plan, so I am deliberately not quoting one, because an unverified figure is worse than none. Two reliable ways to get the real one: the error your compose window raises when a file is refused states the cap verbatim, and your provider's settings page lists it.
If the truth is that your document is 8 MB because it carries a 200-page appendix, no compression tool fixes that well. Cutting the appendix does, and that is a decision rather than a conversion.
Four myths worth dropping
A smaller file is not a more compressed file. Byte size and image compression are different measurements. A document can lose a quarter of its weight with every pixel untouched, which is exactly what the 424.22 KB figure above is. A percentage reported with no word about what was sacrificed tells you nothing.
The quality setting does what its label implies. Not this one. It changes a badge and a number, and the bytes stay identical. Nor is that unusual: a control labelled "quality" only means something if the software re-encodes an image behind it. Those that cannot do that in-browser often ship the dial anyway, because a dial is what a screenshot of a compressor is expected to have.
Linearising does not shrink anything. A linearised PDF, usually sold as "fast web view", relocates the cross-reference table and the first page's objects to the front of the file so a viewer can begin rendering without seeking to the end. That is a layout optimisation, not compression. It makes your PDF open faster. It does not make it smaller, and if a rejected attachment is the problem in front of you, linearising will not touch it.
Free compressors upload your file, so they are all equally untrustworthy. Most hosted ones do, and that is a fair reason to hesitate. This one demonstrably does not: the page loads the PDF engine into the browser, reads your file from disk, rewrites it in memory and hands it back. There is no fetch call and no document URL in the compressor at all. Open the Network tab, load a PDF, and watch nothing leave.
Related tools and further reading
- Browser PDF compressor — structural repack in your browser, no upload, no sign-up. Best when your file has selectable text and no oversized images.
- Compressing a PDF without losing quality — the other half of this problem: what "without losing quality" can and cannot promise.
- Merging PDF files free — a different job entirely, worth reading when a file is oversized because it contains six others.
- PDF merger and splitter — for when the honest fix is removing pages rather than shrinking them.

Written by
Lena Fischer
I compare visually, because everything else is a proxy. A file that halves in size and turns a table into grey mush has not succeeded. Compression operates at several layers and only one of them is usually under your control.
The file structure can be reorganised and streams rewritten, which saves space without changing a single pixel. Then there are the images, and here the loss happens. A scan stored as a bitmap can be downsampled or recompressed and will look worse. A vector drawing recompressed badly can break. That is why the sensible workflow differs by document. A text document should be recompressed at the structure level and its images left alone.
A scan is almost entirely image, so the image settings decide the outcome. Resolution is the setting that matters most for scans. Text in a scan needs enough resolution to keep its edges crisp, and going below that produces the blotchy, unreadable result that makes a file feel worse despite being smaller. Grayscale conversion is the cheapest real saving on a monochrome document, and it costs nothing visually. It costs a great deal on anything with colour, so it belongs behind a check rather than a default.
My pages end on a target rather than a number. The useful question is what resolution the page will be viewed at, and compressing for that beats compressing for a smallest-possible file every time. It also helps to know what the file is for before choosing a target. A file going into an email attachment and a file being uploaded to a document store have different budgets, and optimising for the smaller one usually makes the larger one worse.